
This feature can be used to replace an item in the scene with a different item from your organization’s Parts Library. The feature is often used when there is a new version of a given part. Replacements into the scene tree are saved automatically and all users viewing the scene will see the updated scene tree.
- Open a model in Publishing mode.
- In the scene tree, right-click on the item you want to replace to open the context menu.
- Select Replace in the menu.
- Note that if you do not have the Publish context menu enabled in your User Settings, then the Replace menu option will be located in the Modify fly-out menu.
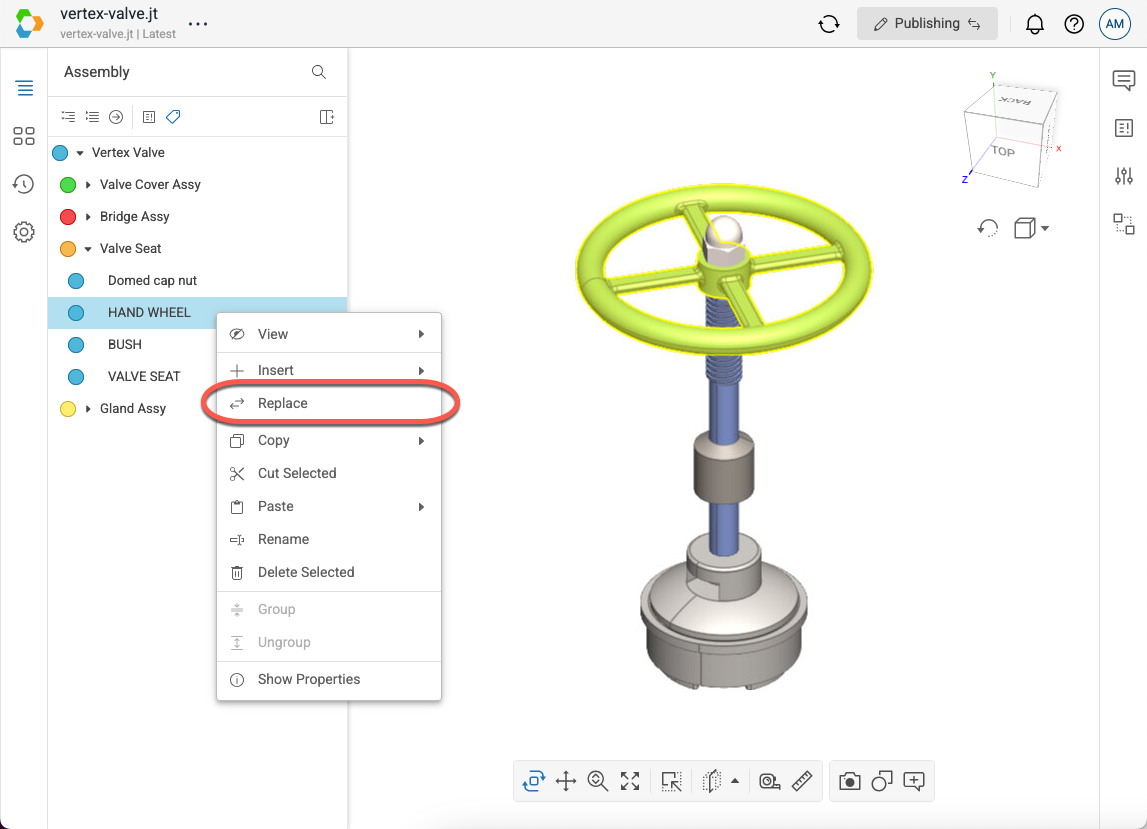
- Note that if you do not have the Publish context menu enabled in your User Settings, then the Replace menu option will be located in the Modify fly-out menu.
- In the Parts Library dialog, locate the desired part to replace the existing part.
- You can search by the part’s name or supplied id. To change the search method, select the gear icon next to the search bar.
- Select Replace to replace the existing part with the part selected in the dialog.