Desktop
- On the model toolbar, click Point to Point Measurement
 .
. - Click two points on your model.
A label with the distance appears along with a more detailed measurement window.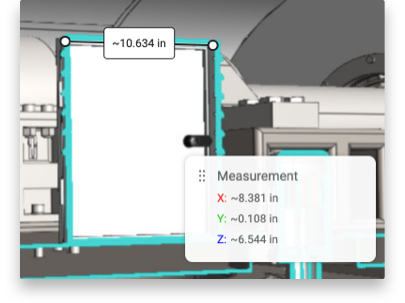
Note: When measuring points on a cross section, if you are close to the section, but not entirely on it, the anchor point automatically snaps to the section highlight for you.
- To change the units of measurement, go to the Settings
 panel.
 - To reposition the Measurement Details window, hover over
 , and drag the window to a new location.
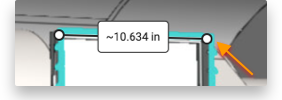
 - To reposition either point in your measurement, make sure it’s active by clicking the label and then dragging the point to a new location. The distance updates to show the new value.
- To delete a measurement, make sure it’s active by clicking the label and then press the Delete key.
- To capture your measurements in a snapshot (3D Viewer only), click Capture Snapshot
 .
.
If you want others to see your measurements, add the snapshot to a story, and share it with them. If you want collaborators to be able to create their own measurements, open the story and edit the settings of that snapshot.
Mobile
3D Viewer - Currently, you can only create measurement in a desktop environment.
Vertex Story - If measurement is included in a snapshot in a story, you can view the measurement, but you can’t create your own, even if the story creator enabled measurement.